In recent years, many people have become more conscious about what they put on their skin. With increasing awareness around harmful chemicals and synthetic ingredients in commercial skincare products, the shift toward natural, homemade alternatives is growing rapidly. One such product that is easy to make at home and offers amazing results is lip balm. Not only is it cost-effective, but a homemade lip balm made with natural ingredients also allows you to control exactly what goes onto your lips.
In this article, we’ll walk you through everything you need to know about making your own lip balm at home—from the ingredients and tools you’ll need, to step-by-step instructions and a few customization tips to make it uniquely yours.
Why Make Your Own Lip Balm?
Before diving into the “how,” let’s talk about the “why.” Most store-bought lip balms contain petroleum-based ingredients, artificial fragrances, and preservatives that can be drying over time. While these ingredients may provide a temporary feeling of moisture, they can often make your lips more dependent on constant reapplication.
Natural lip balms, on the other hand, focus on nourishing, healing, and protecting your lips without any unnecessary additives. Plus, making your own balm is surprisingly simple, fun, and can even be a great homemade gift for friends and family.
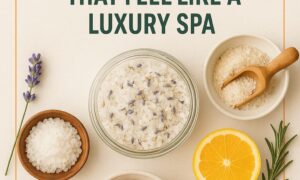
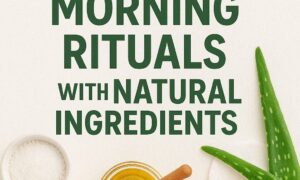
Basic Ingredients You’ll Need
The beauty of making lip balm at home is that it requires only a few key ingredients. Here’s a basic list to get you started:
- Beeswax pellets (or candelilla wax for a vegan option): This is the base that gives the lip balm its solid form and creates a protective barrier on your lips.
- Carrier oil (such as coconut oil, sweet almond oil, jojoba oil, or olive oil): Oils are essential for moisturizing and nourishing the skin.
- Butters (like shea butter, mango butter, or cocoa butter): These add an extra level of richness and hydration.
- Essential oils (optional): For fragrance and added benefits. Popular choices include peppermint, lavender, and vanilla.
- Vitamin E oil (optional): This acts as a natural preservative and provides antioxidant benefits.
Tools You’ll Need
- A small double boiler or a heatproof bowl over a pot of boiling water
- A spoon or small spatula
- Lip balm containers or tins
- A pipette or dropper (optional, for easy pouring)
Step-by-Step Instructions
- Measure the Ingredients
A common ratio that works well is:- 1 part beeswax
- 1 part butter (e.g., shea butter)
- 2 parts carrier oil
- Melt the Mixture
Place all ingredients into your double boiler or heatproof bowl. Heat gently over low to medium heat, stirring occasionally, until everything is fully melted and combined. Be careful not to overheat or boil the mixture. - Add Extras
Once the mixture is melted, remove it from the heat. Let it cool slightly before adding a few drops of essential oil (usually 5-10 drops is enough) and vitamin E oil if using. Stir well to combine. - Pour into Containers
Carefully pour the mixture into your lip balm tubes or tins. A small funnel or pipette can help avoid spills. Leave the containers open and allow the balm to cool and harden completely at room temperature (this usually takes about 30 minutes). - Label and Store
Once fully cooled, place lids on the containers and label them with the date and ingredients. Store in a cool, dry place. Homemade lip balm typically lasts about 6 months.
Customization Tips
One of the best parts about making your own lip balm is that you can tailor it exactly to your preferences:
- For color: Add a pinch of beetroot powder, cocoa powder, or mica pigment to create a tinted balm.
- For added shine: A little castor oil in your mixture can add a glossy finish.
- For exfoliation: Mix in a tiny amount of fine sugar to turn your balm into a scrub.
Safety Tips
Even natural ingredients can cause reactions in some individuals, so it’s always a good idea to do a patch test before applying new products to your lips. Also, when using essential oils, stick to small amounts, as they are very concentrated.
Conclusion
Making your own homemade lip balm is not only simple and fun but also empowering. It allows you to take charge of what you put on your skin and offers peace of mind knowing every ingredient is safe and natural. Whether you’re looking for a DIY project, an eco-friendly gift, or just want to ditch petroleum-based products, this is a great place to start. Give it a try—your lips will thank you!